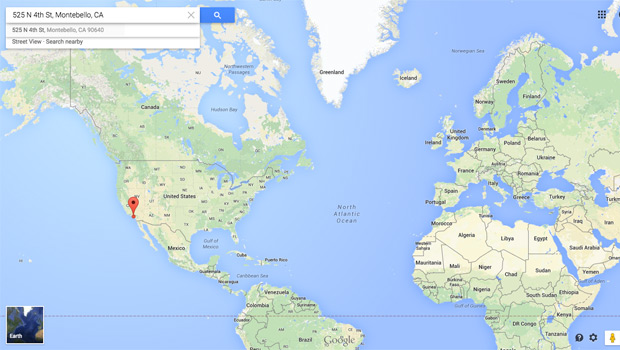
You can achieve some amazing things with the Google Maps API. The most common and practical task for many websites is creating a small-scale map for a designated location. For such a simple task you don’t even need to leverage the Google Maps API. You can visit the Google Maps website and type in your desired location. A map is then generated with the corresponding share and embed code. You copy that code onto your website and adjust the sizing of the map using CSS. But what if you wanted to personalize this map a bit with your own logo as a custom marker? This custom marker can be added to the map with the Google Maps API and the goal of this tutorial is to demonstrate how to do this easily.
Google has extensive documentation for their Maps API, but for those who do not want to dig through pages of text I did the legwork! One thing that I found inefficient was Google’s API examples frequently referenced longitude and latitude coordinates. While it is relatively easy to find the coordinates for your address online, it is still an extra task that you shouldn’t have to do. By initiating the Geocoder class before drawing the map and custom marker, this script only requires that you have your designated location address and the URL to your custom marker image:
<style>
#map {
	/* Width and height is very important for the map to show */
	width: 100%;
	height: 500px;
}
</style>
<script src="https://maps.googleapis.com/maps/api/js?v=3.exp"></script>
<script>
function initialize() {
	geocoder = new google.maps.Geocoder();
	map = new google.maps.Map(document.getElementById('map'), { zoom: 15 });
	geocoder.geocode( { 'address': '525 N 4th St Montebello, CA 90640'}, function(results, status) {
		if (status == google.maps.GeocoderStatus.OK) {
			map.setCenter(results[0].geometry.location);
			marker = new google.maps.Marker({
				map: map,
				position: results[0].geometry.location,
				icon: new google.maps.MarkerImage('https://miceandpen.com/wp-content/uploads/marker.png')
			});
			infowindow = new google.maps.InfoWindow({ content: '525 N 4th St Montebello, CA 90640' });
			infowindow.open(map, marker);
		} else {
			alert('Geocode was not successful for the following reason: ' + status);
		}
	});
}
google.maps.event.addDomListener(window, 'load', initialize);
</script>
<div id="map"></div>
The first thing that needs to be done is include the Google Maps API script:
<script src="https://maps.googleapis.com/maps/api/js?v=3.exp"></script>
Create a div element as a placeholder where the map will show in the DOM, assign this div an ID:
<div id="map"></div>
The div element can be styled with CSS normally. The div ID will be referenced when the google.maps.Map constructor is called. In my example I have the div width set to 100% so that it can used for responsive design. One important detail to note is setting a width and height is required for the map to show. The map itself is constructed with the “initialize” function. Address is passed as an argument to the google.maps.Geocoder.geocode method. You do not need to know longitude and latitude coordinates. The Geocoder class returns these coordinates for you. The custom marker image path is passed as an argument to the google.maps.Marker constructor. You can also add an information window with the google.maps.InfoWindow class. I used this to write out the address of where the marker is set. HTML code can also be used for special text formatting within the information window. Last but not least you need to call the “initialize” function when the DOM loads to start the action:
google.maps.event.addDomListener(window, 'load', initialize);
The final example can be seen here on my contact page. Check the Google Maps API documentation for their full list of available APIs and functionality.